
 In order to achieve our “Zero Waste” goal, we at ecogreenlove, have started home composting. Is amazing the amount of scraps that we throw away and can become something useful as fertiliser for our soil for our balcony garden.
Here we introduce The Bokashi Compost Bin. Ideal for urban kitchens, like ours, that are small and we don’t have a garden where to place a “bottom-less” compost bin.
Continue reading to know How it Works, the Advantages and How Easy it is to use.
| I do not own the information described here. The following text(s) have been collected from external websites with the only purpose to share the information. All Sources with their respective links are marked at the end of the article. |
Definition: “Bokashi” is Japanese for “fermented organic matter.” When using the bokashi method, you layer kitchen scraps (veggie and fruit, along with meat and dairy) with a Bokashi innoculant. The innoculant usually consists of either wheat germ or sawdust combined with molasses and Effective Microorganisms (EM). When layered and left to sit for up to ten days, the mixture ferments. After ten days, the fermented mixture can be dug into the garden or added to a compost pile to finish decomposing. It’s an effective way to deal with kitchen scraps, and a sure way to make typically intriguing items (such as meat and dairy), less interesting to marauding animals who might raid your compost pile otherwise.
Also Known As: Bokashi composting
Examples: Once my bucket of Bokashi is finished fermenting, it is the perfect addition to my compost trenches in the vegetable garden.
From Bokashi by Colleen Vanderlinden
Bokashi Composting
A fast, easy way to compost ALL of your food scraps.
Bokashi is an anaerobic (no air) decomposition process. It is fermentation, think “pickles,” “wine,” or “yogurt.” It is simple to do, provides fast results, puts off little to no smell, and can be convenient for all homes. You can compost all of your food scraps right in your own kitchen, garage, or patio. Bokashi means “Fermented matter” in Japanese and has been practiced by farmers in Japan for centuries. Only recently has Bokashi made it’s way to the U.S.
Bokashi VS Bio-digesterWhile the end result is similar, there are several key differences between the Bokashi method and the Bio-digester method. The main difference is that Bokashi uses beneficial microbes, or living microscopic celluar organisms, while traditional composting uses heat and soil microbes to break down plant matter. The Bokashi method allows you to compost all of your food scraps, and not just the plant based food waste. This results in higher quality compost that has more nutrients and beneficial microbes for your soil.
|
||||||||||
What you need
How to make your Bokashi bucket system You can purchase commercially produced Bokashi systems, or you can easily create your own for a fraction of the cost. To create your own, you will need:
Drill several small holes in the bottom of one of the buckets. This will be the top bucket that sits inside the other. The holes allow any liquids to separate from the food scraps and collect in the space between the buckets. This liquid has many uses in the garden and around the home.
Bokashi Bran Bokashi starter, often called “Bokashi mix” or “Bokashi Bran” is simply just oat bran or rice, molasses, salt, and ceramic powder, with EM-1® microbes growing on it. |
||||||||||
Step By StepFermentation 1. Sprinkle a layer of bokashi bran in the bottom of the bucket.
2. Empty out your refrigerator. Add in up to 2” of food scraps.
✅ Vegetables, fruits, grains, cooked or uncooked meat including bones, eggs and egg shells, cheese, coffee grounds, paper filters, tea leaves and bags, last week’s spaghetti, etc… ❌ Do not put aluminum foil, wax paper, plastic plates, plastic silverware, etc… Only food waste should go in the bucket. ✅ If you can eat it, it can go in the bucket. Tip: It works best to break the larger items into smaller pieces. Also, smaller whole items such as grapes or small tomatoes should at least be punctured to provide the microbes a way to get inside and get to work. 3. Cover with the bokashi bran. Please note that you cannot add too much bokashi bran, but you can add too little. Your nose will be your guide here; if it smells bad, add more bran. If it has no smell, or a slight sweet or vinegar smell, you are doing fine.
4. Use your plate or “mid lid” to press down and remove the air. Leave your mid lid on top until you are ready to add more, this helps keep a little bit of pressure on the food and the air in the bucket off of the top layer.
5. Close the bucket lid tightly.
6. Repeat steps 2 – 5 until the bucket is full. It may take a few days to a few weeks to fill your bucket, depending on your family size and bucket size. Depending on the type of food you put in the bucket and the amount of Bokashi mix you use, the reservoir at the bottom (the second bucket) will fill with liquid. This liquid or leachate is often referred to as “bokashi tea” or “bokashi juice.” If the reservoir gets full, you will need to empty it. You don’t want your food scraps sitting in the liquid, this will slow the process. You can pour the bokashi tea down your drain to prevent your drain from smelling or cloging. You can also dilute it and use it as an extremely potent fertilizer for your plants. 1 cup of Bokashi tea to 5-6 gallons of water. You must use it within 24 hours of removing it from your bucket. 7. Regardless of how long it takes you to fill your bucket, when it is full, seal the bucket tightly and wait 2 weeks for the fermentation process to complete. During this two weeks, do not open the bucket. It is a good idea to have two or more bokashi buckets, this way you can fill one up while the other is in its two week fermentation period. Decomposition Option 1 Once fermentation is complete, you will need to finish the process outdoors. 8. Drill large holes in the bottom of an outdoor bucket. The holes should be big enough for worms to pass through. 9. Dig the bucket part way into the ground.
10. Place the contents of the Bokashi bucket with alternating layers of soil in the outdoor bucket. 11. Place the lid on tightly so animals don’t get into it. Wait 3-6 weeks. 12. It is done when it looks like compost. Harvest the finished product for use in your garden, or plant your plants in that location. You will have the fastest growing, greenest garden or flowerbed in the neighborhood. 13. Rinse the Bokashi bucket and start the whole process over again. Decomposition Option 2 Once fermentation is complete, you will need to finish the process outdoors. 8. Dig a hole about 12-18 inches deep in your garden or back yard away from any structures, and pour the contents of your Bokashi bucket into it. 9. Cover the hole with dirt. It typically takes about 8 inches of dirt on top to prevent animals from digging it up. 10. Wait 2-4 weeks 11. Harvest the finished product for use in your garden, or plant your plants in that location. You will have the fastest growing, greenest garden or flowerbed in the neighborhood. 12. Rinse the Bokashi bucket and start the whole process over again. *Note: The decomposition step may take longer the first time around, depending on the current quality of your soil. For example, the North Texas clay may take up to 8 weeks for the food to fully decompose. As your soil improves around the decomposition site, it will take less time as there are more beneficial microbes in the soil. Option two will always be faster, but more difficult to harvest.
Burying Bokashi Compost in the garden will supply the plants with a nourishing food source and condition your soil with enriching microbes. The Bokashi Bucket composting system significantly accelerates the composting process of organic waste. Bokashi Compost is acidic when first dug in, but neutralizes after 7-10 days. Be sure plant roots do not come directly into contact with the compost as it may burn the roots, particularly if the plants are very young. Fresh compost can be stressful to new plants so it is best to wait at least two weeks before planting your favorite veggies, flowers etc. Visit Texas SmartScape for tips and info on using native Texas plants to conserve water. SmartScape plants and organic compost from your bokashi will yield incredible results. |
||||||||||
Tips and TroubleshootingAir is the enemy, compact the waste to remove the air and leave the mid lid in place. Keep liquids to a minimum, excessive fluids slow the process. Drain the Bokashi juice (leachate) if possible, the two bucket system works well for this purpose. You will probably want to wear long rubber gloves when burying the bokashi after the fermentation is complete. It will smell like really strong pickles or vinegar and you don’t want that getting on your skin. Once buried and the buckets are rinsed, the smell will dissipate quickly. Rinse the buckets well with just water after each use and let it air dry outside.
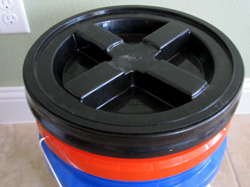
A great addition to you bokashi bucket is a screw on lid. You can usually pick up one of these at your local home improvement depot in the paint section. *Some images and information courtesy the City of Plano. |


You can find much more information about Bokashi, here are some suggested links:
• Composting, Worm Farms and Bokashi
• Bokashi Bucket Fermenting and Waste Burial Photographs
Turn your Spoil into Soil

Thank you for passing by! 🙂 Did you like this post? Did you find it useful or inspiring? If so, please take a moment and support our blog so we can continue doing what we love.
![]()
